


Support · For clients & adventurers
Finding, booking and planning your trip
How to find the right pro, plan a trip with your crew, book and pay, and keep an eye on the snow. Browsing MEETR is always free, and so is your account.
On this page
Find a guide or instructor
- Search: type an activity in What (ski lessons, fly fishing, backcountry) and a place in Where.
- Start from a resort: every resort page in the ski resort database lists guides and instructors nearby, plus where to stay.
- Read the profile: certifications, photos, reviews, and the trips they offer with prices under Trips & availability.
Your MEETR account
You don’t need to sign up before you book. When you send your first trip request, MEETR creates your account with the email you used and sends you a link to set a password.
- Send a trip request with your name and email.
- Check your inbox for the email from MEETR and select Set your password. The link works for 7 days.
- Choose a password. You land on your dashboard with your request already under Trips.
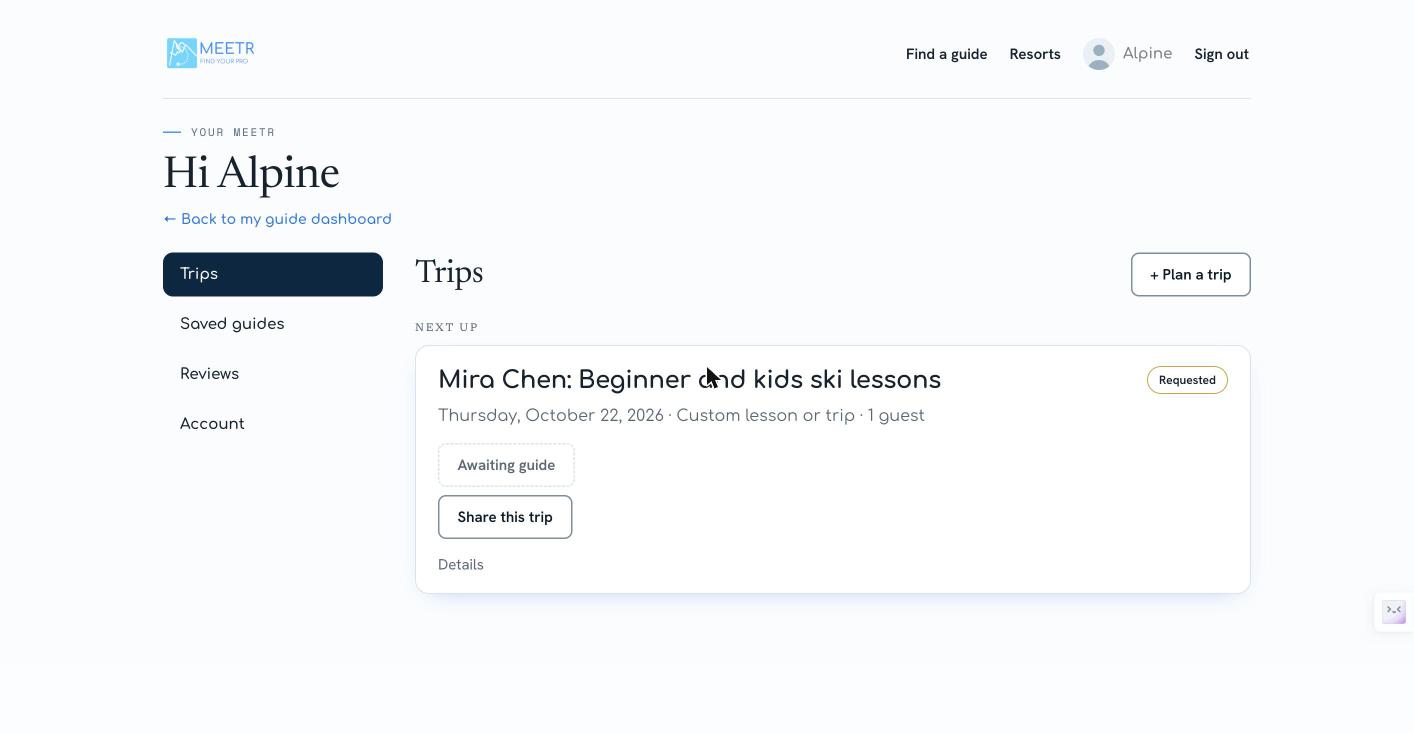
Your dashboard has four parts: Trips, Saved guides, Reviews and Account. Add a profile photo under Account so your guide recognises you at the meeting spot.
Trip profiles
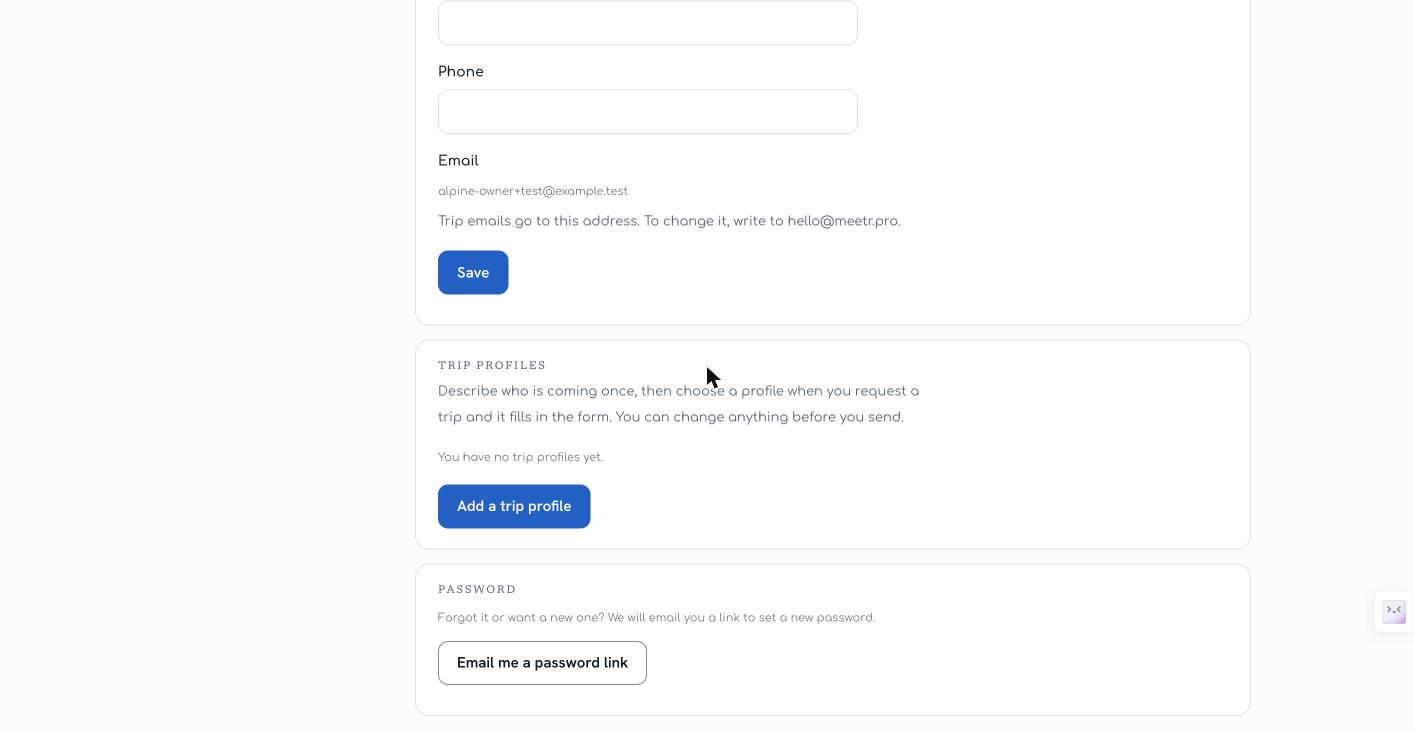
A trip profile tells your guide who is coming and what you want out of the day, so you don’t retype it every time. You can keep as many as you like: “Skiing with the kids”, “Skiing solo”, “Fly fishing with Dad”, “Mountaineering”.
- Open Account
From your dashboard, select Account, then Trip profiles. - Add a profile
Give it a name, pick the activity and your ability level, and write your goals (“Ski bumps and steeps with more control”). - Add who is coming
Select + Add a person for each person, with their name and age. Remove anyone with the ×. - Pick a default
Mark the profile you use most as your default. It is preselected when you book.
Your guide sees the profile you chose on your request: the activity, ability, goals, and each person with their age. They never see your other profiles.
Plan a trip
Not ready to book? Collect options first. Every guide and resort page has an Add to Trip button.
- Select Add to Trip on a resort or guide, then pick an existing trip or start a new one with dates.
- Keep adding. A trip can hold several resorts and several guides while you compare.
- Open Trips in your dashboard. Trips you are still planning show as Planning.
- When you have chosen, select Request this trip. The guide’s request form opens with your dates filled in.
Request a trip
- Pick a trip
On the guide’s profile, under Trips & availability, choose the trip you want. - Pick a date
Greyed-out dates are ones the guide can’t do. - Use a trip profile
Signed in? Choose a trip profile at the top of the form. Your name, contact details and group fill in, and you can edit anything before you send. Not signed in? Fill in the form, and you can save it as a trip profile at the end. - Add a note
Anything the guide should know: experience, injuries, a meeting spot, a goal for the day. - Send
Select Send Request. You get a confirmation email, and the request shows under Trips as Requested.
What it costs
You pay the guide’s price plus a 1.5% MEETR service fee, shown before you pay. MEETR takes no commission from your guide, so the price you see is what they charge.
Pay, reschedule or cancel
| Status | What it means | What you do |
|---|---|---|
| Requested | Your guide hasn’t answered yet. | Wait for their reply, usually within a day. |
| New date proposed | Your guide can’t do your date and suggested another. | Accept the new date or cancel. |
| Confirmed | Your guide said yes. | Select Pay now (for guides who take payment on MEETR). Otherwise settle up as the guide describes. |
| Paid | You are booked. | Select Add to calendar. Your receipt is on the trip. |
| Completed | The trip is done. | Leave a review, and a tip if you like. |
| Cancelled | Cancelled, declined or refunded. | Nothing. Any refund goes back to your card. |
- Paying: payment is by card through Stripe. MEETR never stores your card number.
- Receipts: open the trip under Trips and select Receipt. It is also in your confirmation email.
- Rescheduling: ask your guide in your note or by replying to their email. If they agree, they propose the new date and you accept it on the trip.
- Cancelling: open the trip and select Cancel. What you get back depends on your guide’s cancellation policy, which you see before paying. If your guide cancels, you get a full refund including the service fee.
Share with friends
Most good days on the mountain are group days. Share what you have found:
- Share a guide or resort: select Share on any profile or resort page and send the link by text, WhatsApp or email.
- Share a trip: open a trip under Trips and select Share. Your friends get a page with the resort, dates, guide and the snow forecast. They don’t need an account to see it, and it never shows your phone or email.
Snow forecasts and alerts
Every resort page shows a snow forecast for the next week at the base, mid-mountain and summit. Snow at 11,000 feet and rain at the base happen on the same day, so check the elevation you will ski.
- On a resort page, select Follow.
- Turn on a storm alert and we email you when a storm is forecast to drop real snow, once per storm, not every morning.
Forecast data comes from Open-Meteo and the US National Weather Service. Forecasts are forecasts: check the resort’s own report before you drive.
After your trip
- Leave a review from the trip in your dashboard or from the email we send the day after. Honest reviews help other clients and help good guides get found.
- Tip your guide from the thank-you email or the leave-a-tip page. The whole tip goes to your guide.
- Book again with one click from the completed trip.
Saved guides and resorts
Select Save on any guide or resort to keep it for later. Everything you save is under Saved guides in your dashboard, next to the resorts you follow.